Templates and Specific Instructions - for Dotty & Ellipse Packs
Playtime
Some of us are loose and prefer no directions. Happy to create without guidelines or preconceived notions. Others prefer a plan. For all of you planners out there here are a few installation ideas broken down for you to use yourself or adapt.
You might enjoy doodling a few loose sketches while you wait for your wall stickers to arrive. Consider your chosen space. Look at the designs linked to this website. Come up with some of your own if you like. A loose sketch in stages is a good working plan. With “Cephl apod” I had an idea….looked at the wall, sketched it down (2 minutes, very loose and rough but it gave me a feel for how I could approach the wall.)
I blue tacked that sketch to the wall, moving it about with me as I went, giving it a glance now and then. A plan can be a good starting point but the best plans are flexible. Our stickers are so easy to peel off and reapply that if you need or want to change your plan as you go you can. Stand back every now and then to get a feel for how you’re progressing.
Be open to making changes. Most importantly have a playful heart. If you’re happy it comes through in what you do. Put on some music that makes you feel great and play.
a 230 Dotty pack

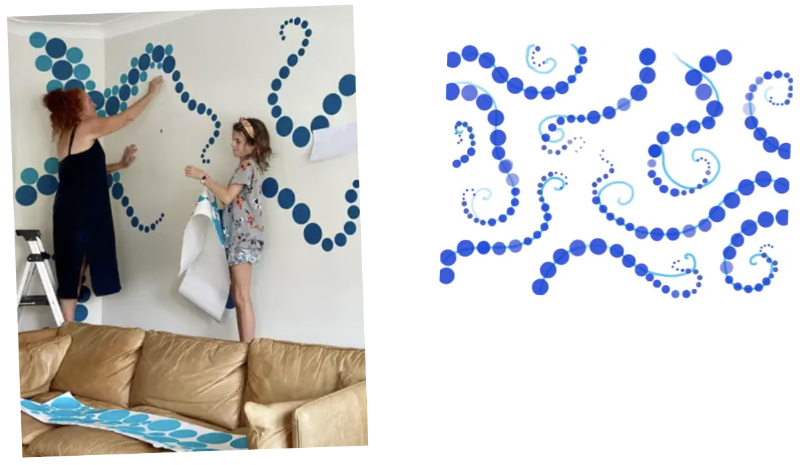
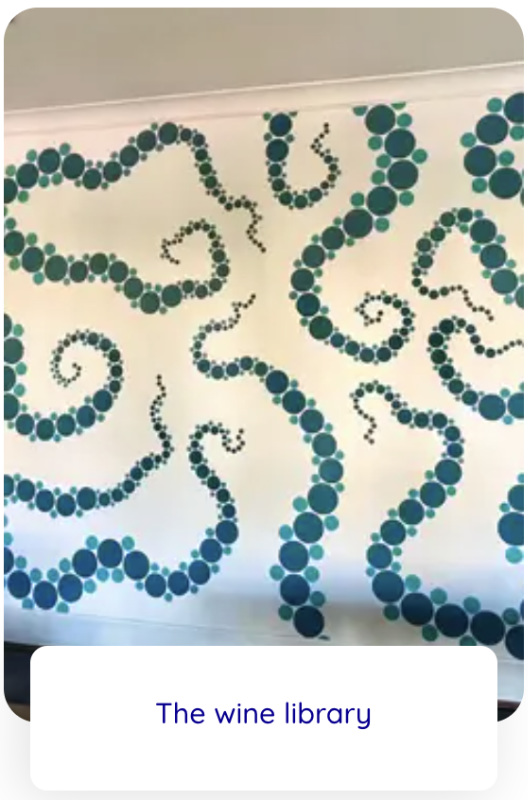
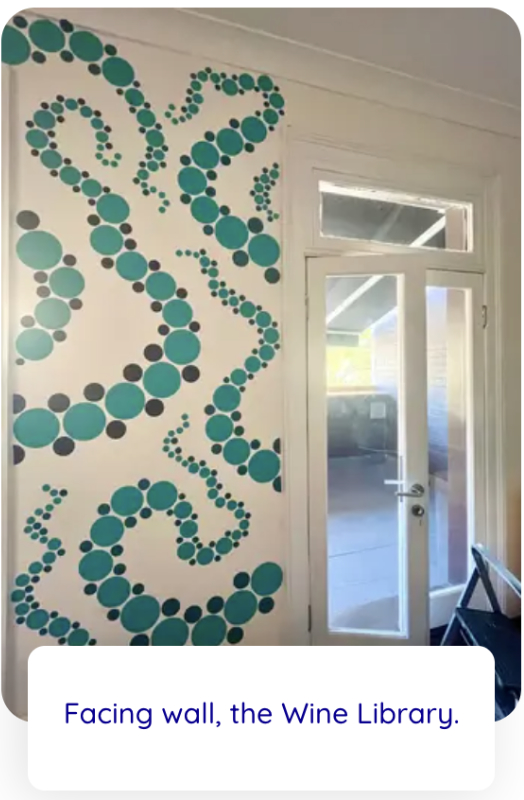
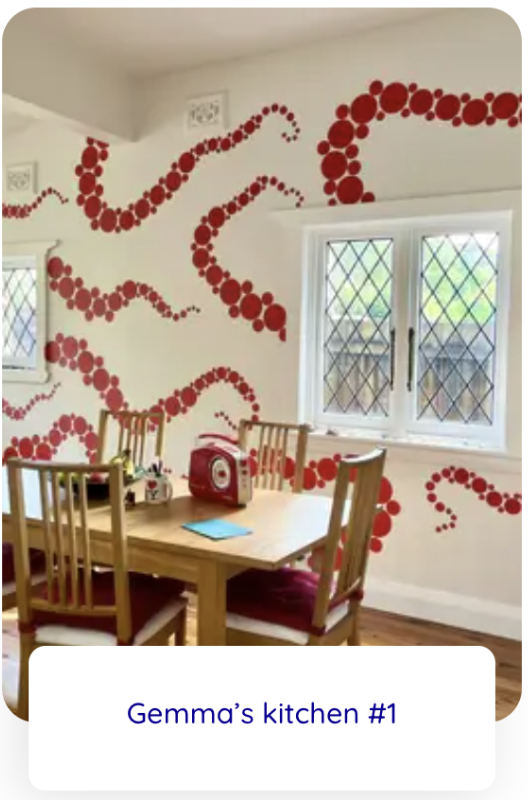
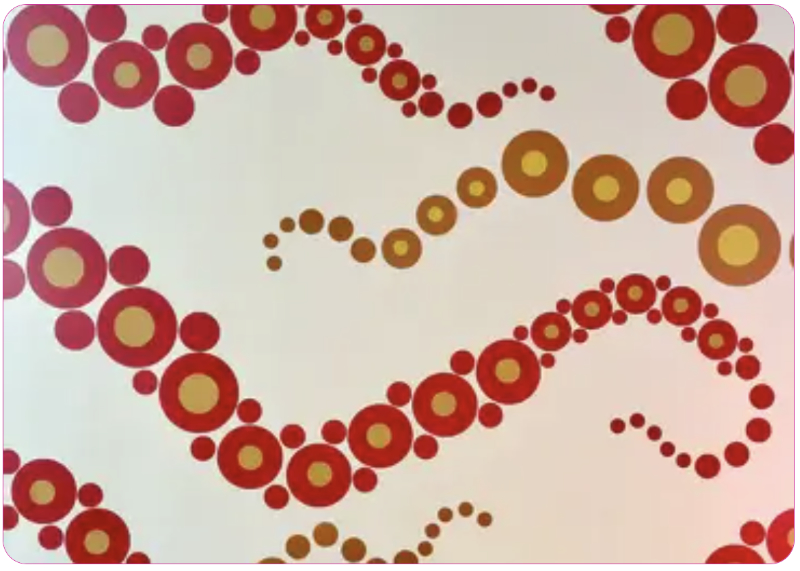
Cephalopod
Needed:
A Dotty pack. Two colours of your choice. Optimally a lighter and a darker. A 250 pack will do a smaller space, 600 for a medium wall, 1000 plus for a larger wall (10m x 3m), it does depend on how many tentacles you create and how close they are to each other. Any left over dots can be used to create a feature in a smaller space, a doorway or another wall.
Inspired by octopus tentacles “Cephalopod” is playful and organic.
Step 1 - Planning and the center line
Loosely sketch your tentacles. Try alternating their directions be aware of keeping a flowing, even space between the lines, avoid tight curves…these will be too tricky later as you add the second colour. More openly spaced tentacles creates a more relaxing installation. densely spaced tentacles create more energy, more motion. Think about your space and how you want it to feel. What feeling do you want to create?
Step 2 - The Center line
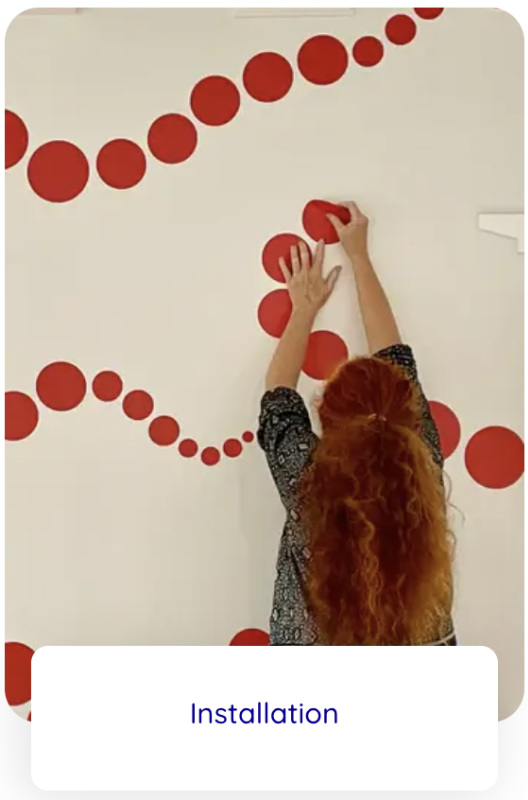
I found I preferred starting with the biggest sticker in the dotty pack, putting either 3 or 5 of those in an evenly spaced row. Spacing your stickers can be as simple as placing a finger between them to help with consistency. Follow the curve and direction you want to take. Then add the size down…if your tentacle is shorter…say a 3 stickers at a time tentacle, stick to 3 each time you change sticker size.
If it’s a longer tentacle stick with 5 or whichever number you decide is right for you. Try one of each, step back, assess, then keep going with the numbers that feel right for your space. Keep going until you reach the end of your tentacle and are on your smallest stickers…at this point you can get a lot tighter with your curves.
Step 3 - Outside lines/second colour
This is where it gets more interesting. Now you start adding the outside of each tentacle…using your second colour. Start with your second biggest sticker being placed outside and between your bigger Center line tentacle stickers. Keep an eye on spacing, try to keep it even and consistent. You will develop a nice rhythm. An awareness.
Sometimes you may discover your Center lines curves are too tight to allow the placement of your outside line stickers…some readjustment, repositioning of the Center line may be necessary. Easy. Simply peel a few of, open your curve a bit and continue. Alternatively you may choose to miss a sticker here or there if your curve is tight and you want to keep it that way. This is a very organic type of installation and allows for some disruption to the pattern.
As you get to the end of the tentacle you decide whether you want to run those smaller stickers all the way to the end or stop at the second smallest sticker. Do one of each and see which you like best.
Step 4 - Reconsider / Reposition
Best of all you can change the stickers positions any time you like. Within moments or months/years later. If you take the time to dust your wall first you will get more chances to reposition your stickers. Read our notes on wall preparation. Have fun, play.
* If you want to work in one colour that’s fine. You might choose to place different coloured dots inside larger ones but be aware this does leave a sticky residue on the surface of the larger sticker if you remove the smaller one.
Oscillation
Needed:
Ellipses pack 1000+ will do a 4m x 2.5 m space depending on spacing.
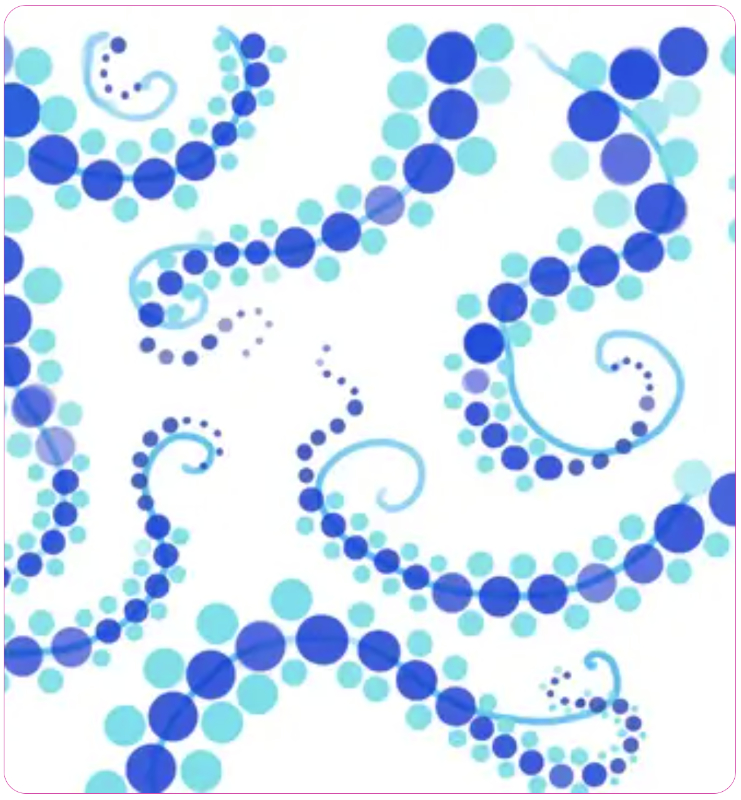
”Oscillation” is inspired by a painting of mine by the same title. Its all about energy moving. keeping things in a healthy flow state. The original painting is in vivid yellows, pinks and oranges. Ellipses suit this very well as there are 20 differently shaped ellipses in the Ellipses pack, creating a lovely organic feel..a literal flow state.
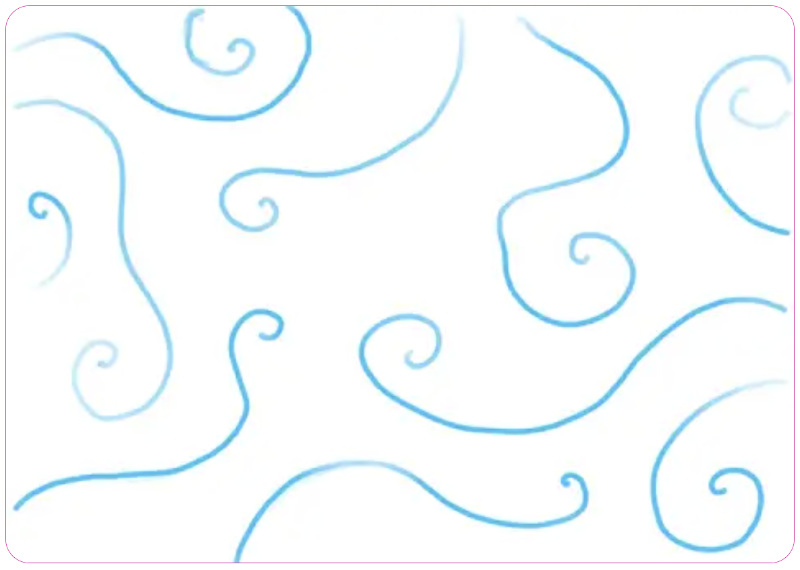
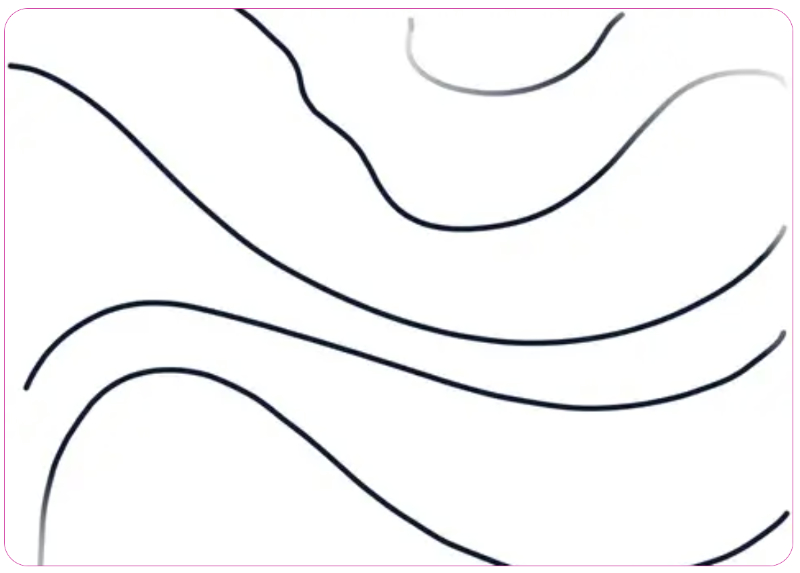
Step 1 - Sketch some flowing lines
Using the sketch below as a guideline create just a few flowing lines that would fit in a similar space to the s you’re planning to install on. Sweeping, smooth lines are great. A semi circle somewhere. A divided line somewhere else. The biggest movement should be along the space with some upward momentum. Keep it simple, just a few lines. Keep the space between the lines irregular, thin here, wider there. If you’re feeling frazzled, relax. Have a cup of tea, sit back, ponder the space. Calm your mind to an almost empty space. Soothing, meditative music is good for this.
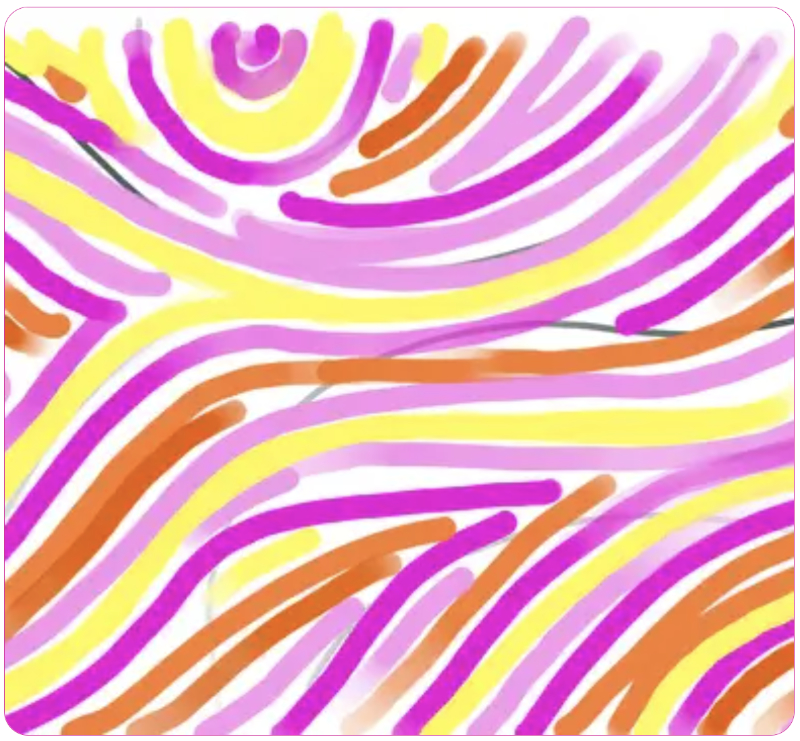
Step 2 - The Colours
*You may like to add an idea of colours to be used and where with text as or crayons on your plan sketch.
I started with the big yellow line. Just one line. From one end to the other, keeping an eye on spaces between the ellipses being consistent more or less. I also kept an eye on placing the ellipses in a way that worked with the direction of the line. You can approach the next step one of two ways.
1. Simply work from that main line out, proceeding line by line toward the edge of the wall, stopping every now and then to check your sketch.
2. After finishing the first yellow line put your other yellow lines in. Then proceed to fill in line after line on one side of the main yellow line. When you finish that side start with the other. This way will mean more problem solving opportunities as you are working between two fixed lines at all times. Any time you need to just peel off and reposition your stickers. Stay hydrated. Have fun.
Mandalas
We have a whole separate section on installing Mandalas, click here!